
GONE Fishing Best Perks: Powerful Trinkets and Combos
Explore GONE Fishing best perks, the instant-catch trinket combo, shared upgrades, and starting perk effects to build your loadout for the 1.0 release.
Jump to
Top Tier: The Instant-Catch Trinket Combo
An instant catch can turn a fishing cast into a fish already sitting in your inventory. Build your GONE Fishing best perks setup around the powerful combination of Deadman's Hand, Captain's Stopwatch, and Hungry hook. Choosing GONE Fishing best perks also means separating personal starting perks from the shared trinkets introduced in 1.0.
That distinction matters before you spend anything. Starting perks affect your character, while purchasing or upgrading a trinket also gives that trinket or upgrade to your friends. Clinket's eight trinkets introduce effects that can activate during fishing, with combinations connecting different parts of the catch.
The instant-catch combination is one of the most powerful combinations in 1.0.
| Name | Tier | Strength |
|---|---|---|
| Hungry hook | Top combo | Has a chance to trigger a bite immediately when casting |
| Captain's Stopwatch | Top combo | Has a chance to perfectly complete the first strike minigame |
| Deadman's Hand | Top combo | Has a chance to reel in a fish immediately |
Each trinket addresses a separate stage. Hungry hook handles the wait for a bite. Captain's Stopwatch handles the initial strike. Deadman's Hand handles reeling the fish in.
When all three activate together, the fish enters your inventory as your bobber hits the water. That is the full combination's payoff, rather than a permanent effect attached to every cast.
Keep fishing normally between activations. These effects are chance-based, so owning the combination does not mean every cast skips the entire fishing sequence.
Follow the sequence when planning your purchases:
- Target the waiting stage with Hungry hook.
- Target the first strike with Captain's Stopwatch.
- Target the reeling stage with Deadman's Hand.
- Combine all three for the full instant-catch interaction.
Coordinate those purchases in co-op. Since trinkets and their upgrades are shared, discuss the next purchase as a group rather than planning separate copies for individual anglers.
For a GONE Fishing best perks setup focused on this interaction, keep the complete fishing sequence in mind. The defining strength comes from connecting the three effects, especially when they activate on the same catch.
Official page: GONE Fishing (gonefishing.gg)
Value Tier: Fish Multipliers and Instant Smoking
Gambler's Doubloon and Devil's Ember affect the reward coming out of a successful catch. These belong together in a value-focused tier because their effects concern the fish you land, rather than the bite or strike.

| Name | Tier | Effect |
|---|---|---|
| Gambler's Doubloon | Fish value | Has a chance to multiply a fish's value |
| Devil's Ember | Fish processing | Has a chance to instantly smoke a caught fish |
Gambler's Doubloon directly targets fish value. Devil's Ember adds instant smoking as a possible result of catching a fish. Keep those effects distinct when choosing what to purchase: a value multiplier and automatic smoking are different benefits.
For your GONE Fishing best perks plan, connect these effects to the daily decision between sacrificing fish and selling them. The altar takes fish toward your quota, while selling fish supplies currency for purchases.
Watch the altar's flame when making that decision. A blue flame signals that the lake's hunger has been satisfied. Use that visible checkpoint before committing the rest of your haul to spending money.
The gambling pool is a separate mechanic from Gambler's Doubloon. The trinket can multiply a fish's value through its own activation; the pool involves gambling a fish and can produce a smaller result.
Protect the fish you need for quota before gambling surplus catches. A spectacular win is exciting, but a reduced fish can leave you with more fishing to do before the day ends.
Keep these distinctions in your purchase plan:
- Choose Gambler's Doubloon to target its fish-value multiplication effect.
- Choose Devil's Ember to target its instant-smoking effect.
- Keep enough fish for the altar before risking surplus fish in the gambling pool.
- Recheck quota after depositing fish instead of judging your progress by the size of your haul.
Neither trinket replaces the need to land fish. Pair value-focused purchases with attention to bait, fishing location, and the catch itself.
Specialist Tier: Bait, Rare Fish, and Buzz Effects
The remaining trinkets serve different goals. Iron worm concerns bait retention, Siren's Conch concerns rare fish, and Bassweiser adds a chance to get a buzz from a catch.

Their effects do not support a single universal ordering. Match each purchase to the mechanic you want to affect.
| Name | Tier | Effect |
|---|---|---|
| Iron worm | Bait specialist | Has a chance to preserve bait after catching a fish |
| Siren's Conch | Rarity specialist | Increases the odds of legendary and mythic catches |
| Bassweiser | Buzz specialist | Has a chance to give you a buzz after catching a fish |
Iron worm: Preserve Bait After Catches
Iron worm gives each successful catch a chance to leave your bait available. Use that effect alongside a bait supply routine rather than heading out without replacements.
In 1.0, bait traps collect bait overnight and become harvestable each morning. Minnow, crab, and rabbit/raccoon traps support that daily collection loop.
Collect your trap bait before leaving to fish. Iron worm works after catching a fish, so bring the bait needed to begin the trip.
Siren's Conch: Target Legendary and Mythic Fish
Siren's Conch increases the odds of catching legendary and mythic fish. Choose it when those catches are your objective, and keep the target fish's other requirements in view.
The Rhizo, for example, inhabits deep water on the Lake map in 1.0. Catching it requires the MOBY rod, which you unlock by defeating the boss.
Follow that progression requirement before building a trip around the Rhizo. A rarity effect belongs alongside the required equipment and location.
Legendary and mythic catches also unlock their associated achievements and hats. Use those rewards as specific collection goals when planning your fishing sessions.
Bassweiser: Add a Catch-Triggered Buzz
Bassweiser gives catches a chance to produce a buzz. Keep its description separate from the beer-duration starting perk, which makes the bonus from beer last three times as long.
Your GONE Fishing best perks choices should reflect those different triggers. Select Bassweiser for its catch-triggered effect; select the beer-duration perk when building around drinking beer.
Starting Perks: Personal Effects and Two Selections
Starting perks occupy a different part of your setup from Clinket's trinkets. You can select up to two starting perks, and the perk unlock condition is surviving seven consecutive days.
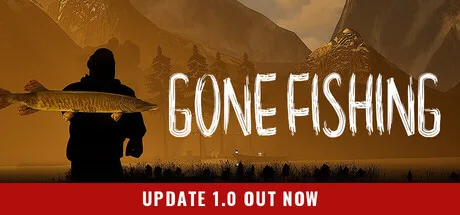 Image: Steam / GONE Studios
Choose those selections for the actions you personally perform. Starting perks apply to the player who selected them, while trinket purchases and upgrades are shared.
| Starting perk | Effect |
|---|---|
| Sticky Hook | Decreases the chance of losing hooked fish |
| Extra Tackle | Increases bait carrying capacity |
| Silent Steps | Reduces sprinting noise, making fish and hostile creatures less likely to be alerted |
| Trained Runner | Increases sprint speed |
| Bug Net | Gives a chance to receive two pieces of bait from a pickup |
| Buds | Increases underwater breathing time |
| Midas Touch | Grants gold every two real-life minutes |
| Fish Whisperer | Increases average fish size by 5% |
| Beer-duration perk | Makes the bonus from beer last three times as long |
Use the effect descriptions to narrow your two choices. For a GONE Fishing best perks loadout, identify what you want your character to do differently before selecting a pair.
Choose Sticky Hook if you want its reduced chance of losing hooked fish. Combine it with Extra Tackle if you also want more bait carrying capacity. These address fish retention and carrying space, respectively.
Choose Bug Net for its chance of doubling a bait pickup. Distinguish that from Extra Tackle: one affects the amount received from a pickup, while the other affects how much bait you can carry.
Choose Trained Runner for increased sprint speed, or Silent Steps for quieter sprinting. If you select both, you are committing your two choices to those movement effects.
Choose Buds for longer underwater breathing. Continue planning your route back to land or the boat; additional breathing time still has a limit.
Fish Whisperer supplies a stated 5% increase to average fish size. Keep that specific effect separate from Siren's Conch, which affects the odds of legendary and mythic catches.
Midas Touch grants gold every 2 real-life minutes. Keep its personal perk selection separate from the group's shared trinket purchasing decisions, even when everyone is discussing the same currency budget.
The beer-duration perk extends the bonus from beer to three times its usual duration. Select it when you intend to use beer, rather than taking it without building that item into your fishing routine.
Put Your Perks Into a 1.0 Progression Plan
Turn your GONE Fishing best perks choices into a short plan before entering the next lobby. Separate your personal selections, the group's trinket purchases, and the equipment required for your target catch.
Start with your saved selections. Perks save automatically after you choose them and apply when hosting or joining a lobby, including a lobby already in progress. Opening the perk selection screen clears the saved choices so you can select replacements.
Finish choosing your perks after reopening that screen. Then coordinate the shared purchases with your friends.
Use this order to organize the discussion:
- Select your two personal perks around their listed effects.
- Decide whether the group is pursuing the instant-catch combination, fish-value effects, or specialist trinkets.
- Collect bait from overnight traps before setting out.
- Bring the equipment required for any specific target fish.
- Check the altar's blue flame before allocating surplus catches to sales or gambling.
Include traps in the wider progression plan. The 1.0 Fish Trap collects fish overnight using bait from your tacklebox, and the bait's value affects the fish it collects. Its upgrade, purchased from Jeb, allows it to collect up to three fish per bait.
Pair a bait trap with a Fish Trap to connect overnight bait collection with passive fish collection. That gives the group another progression tool alongside active fishing and trinket effects.
Build your GONE Fishing best perks setup around a clear interaction: the complete instant-catch combination, a particular personal perk effect, or a specific fishing target. Keep each purchase tied to what it actually changes.
FAQ
What are the GONE Fishing best perks for instant catches?
Combine Hungry hook, Captain's Stopwatch, and Deadman's Hand. When all three activate together, the bite, first strike, and reeling sequence resolve immediately, placing the fish in your inventory as the bobber hits the water.
Are perks shared with other players?
Starting perks affect the player who selected them. Clinket's trinkets are shared: purchasing or upgrading one also gives that trinket or upgrade to your friends.
How do you unlock starting perks?
Survive seven consecutive days to unlock starting perks. You can select up to two, and your chosen perks save automatically for hosting or joining lobbies.
Does Siren's Conch replace the MOBY requirement for the Rhizo?
The Rhizo requires the MOBY rod in 1.0. Defeat the boss to unlock MOBY, then target the Rhizo in deep water on the Lake map. Siren's Conch increases legendary and mythic catch odds.
Continue with
 GONE Fishing Fishing Pole Guide: Cast, Reel, and MOBYMaster the GONE Fishing fishing pole with casting controls, reeling tips, 1.0 trinket combos, and the MOBY unlock path. Prepare for tougher catches today.
More in Gear & Bait
GONE Fishing Bait Tier List: Heart to Worm Rankings
Use this GONE Fishing bait tier list to compare Heart, chopped bait, and early catches. Learn bait scores, trap changes, and how to spend rare bait wisely.
GONE Fishing Heart: Revives, Extra Lives & Bait Guide
Learn how the GONE Fishing heart revives teammates, grants a solo extra life, and becomes tier 6 bait with 99 bait score and doubled legendary catch odds.
GONE Fishing How to Get Boat: Spawns, Resets, and Tips
GONE Fishing how to get boat help: find map boats, use spawn and reset controls, recover a stuck vessel, and bring your fish back before darkness falls.

GONE Fishing PC Depth Finder: How to Use It Correctly
Learn how the GONE Fishing pc depth finder works, where to get it, and how to compare water depths while avoiding outdated upgrade tips and display issues.
Join the community
Official channels for news, updates and player help: